Unfortunately, my "I-Robot Roomba" model doesn't come with a remote or a scheduler to allow scheduled cleans during the day while I was out.
I had to PRESS A BUTTON before I left the house to make it clean! Not hard but I generally forgot to do it.
And heres the solution:
WiFi Web Server Roomba Starter
A simple web server that lets start you a iRobot Roomba via the web.
This sketch will print the IP address of your WiFi Shield (once connected)
to the Serial monitor. From there, you can open that address in a web browser
to start cleaning or dock the roomba.
If the IP address of your shield is yourAddress:
http://yourAddress/H sends cleaning command
http://yourAddress/L sends dock command
I use my mobile or my homeautomation system to schedule the cleaning task and start the roomba via wifi via http request.
created for arduino ide
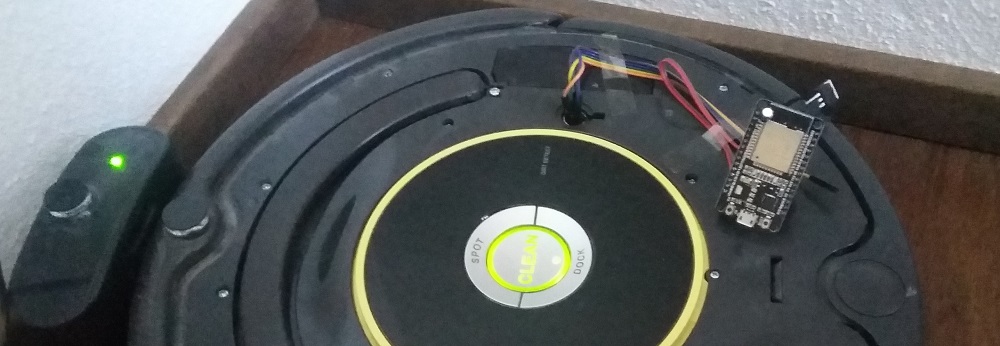
Here a pic of my quick 'n dirty work. :-) In near future i want to move these parts into the roomba, i hope theres a bit space for it. (*) I allready built it into the Roomba, and it works perfect!
What you'll need:
- Ardunio IDE - Arduino IDE - Download
- Arduino core for ESP32 WiFi chip - please follow the install instructions on their site
- The Arduino-Sketch for this Roomba Wifi Starter
Important:
- A Roomba
Components:
- 1 x ESP32 dev Board
- 1 x DC-DC Converter
For communication between the Roomba and ESP32, the Serial Port will be used. By default, Roomba communicates at 115,200 baud.
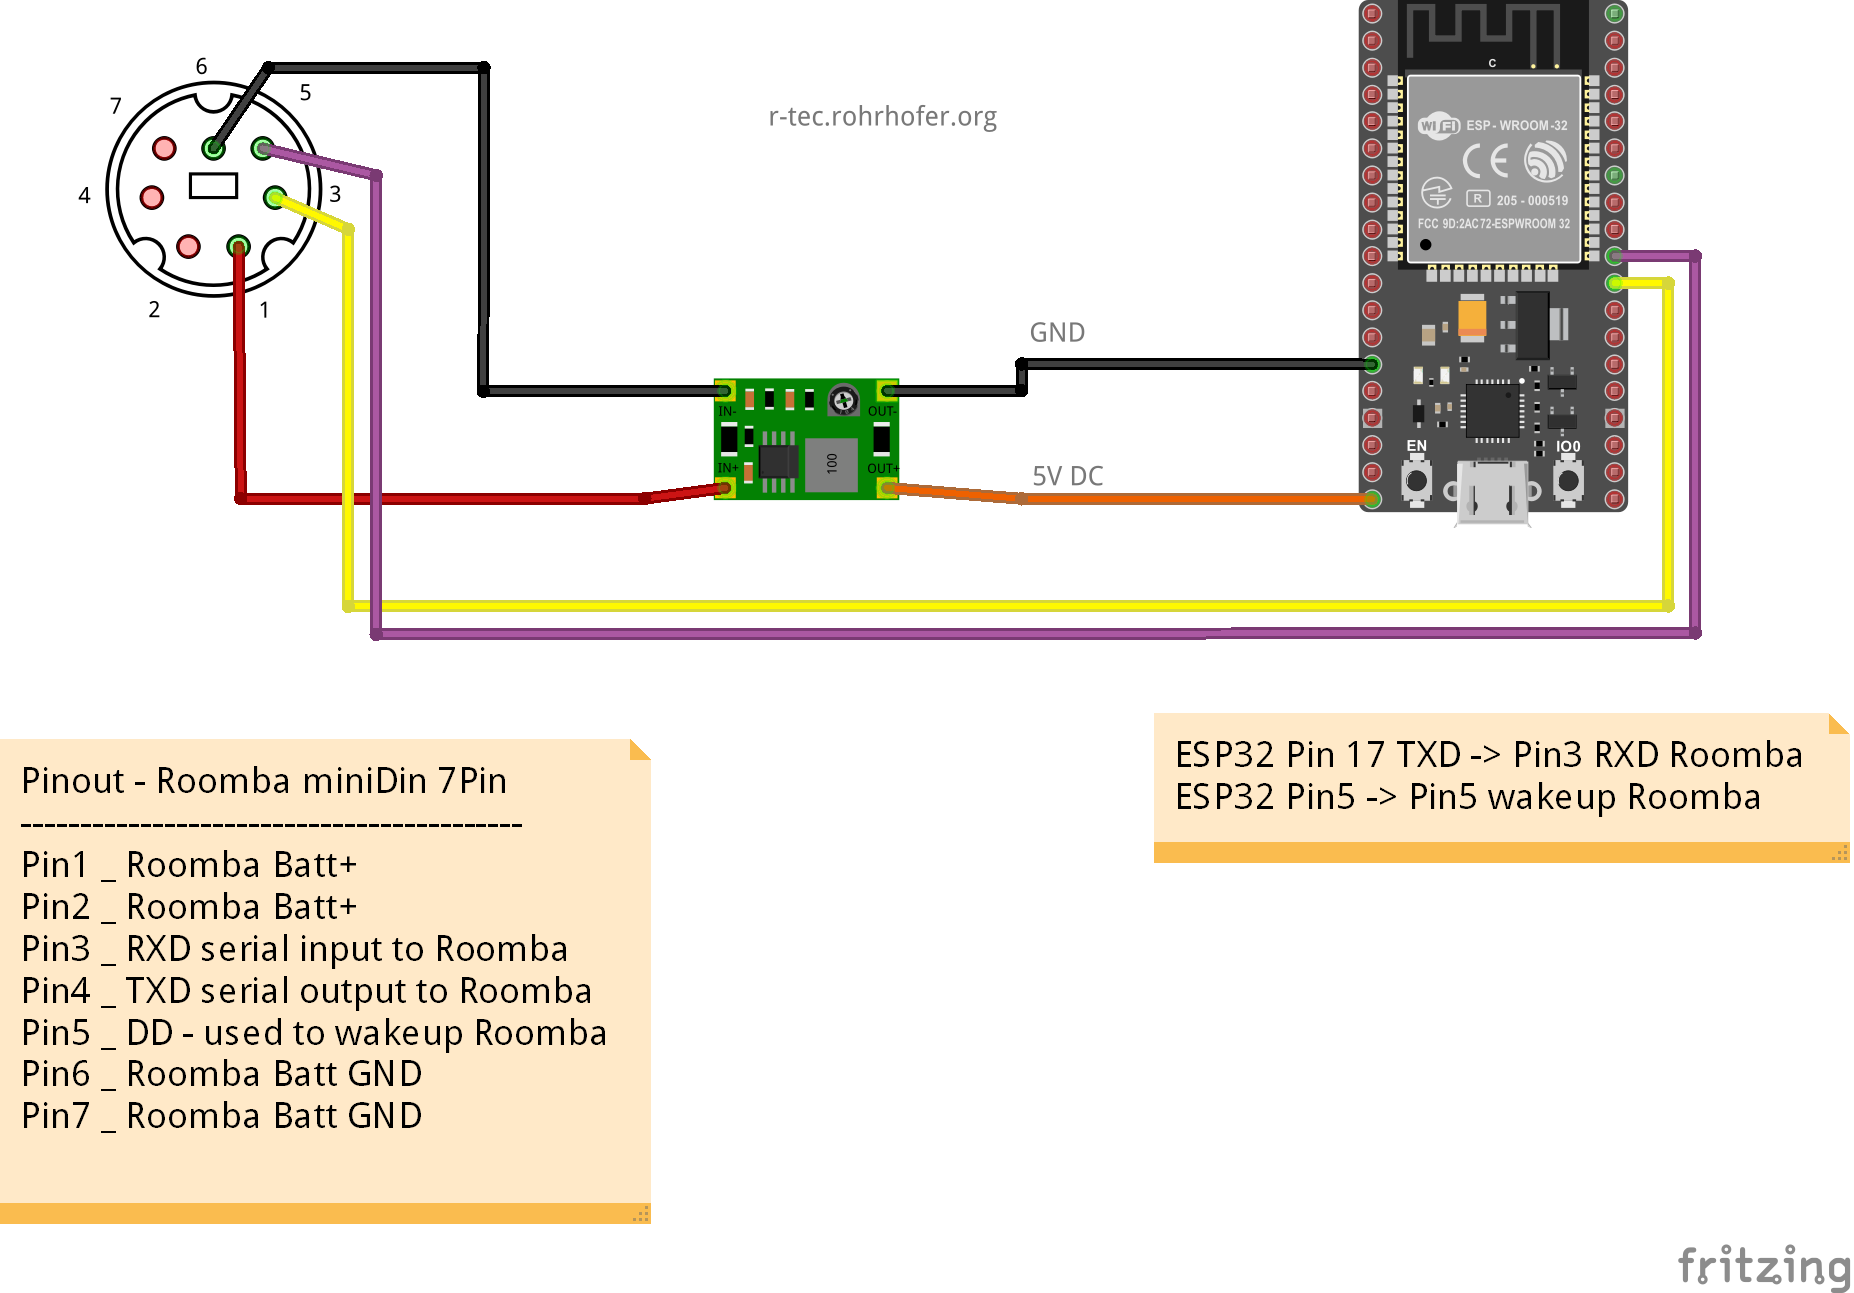
The above diagram shows how the ESP32 should be connected to Roomba Mini-DIN connector.
* Roomba wakeup pin attached to pin 5
* Roomba RXD pin attached to pin 17
* Built in First Step: Removed all Pin headers to save place

I'm thankfully to this site -->How to Open Up Roomba it helped me through the "destruction" of my roomba.
I found some place near the DC Plug, i had to remove it, but anyway I never used it. (Important update: Don't remove the DC-Plug, because the Roomba won't allow loading from the docking station. I had to install it again.)
The wires are solderd directly to the pins underneath the Roomba Plug.
Finnaly I'm very happy with my build! :-) There is nothing to see that this roomba is hacked with an ESP32. This optimizes the usabillity and makes my wife also happy! :-)
If you realise this project with my help it would be nice if you leave a comment with your experience!
Thank you!
Comments powered by CComment